I need a sympathy card in my stash (I hope it collects dust!) just in case, so I made a pretty quick one.
I had to clamp it closed to take the picture, because of the pop dots on the inside, lol. The card is 10x5.25 inches open, and is 5x5.25 inches closed.
The green card stock is cut at: 9.75x5 inches.
The two stripe panels are cut at: 2.00x4.34 inches.
I pasted a striped panel to the back of the card (not pictured), and it is cut at: 4.75x4.75.
I took a piece of black paper and took Tattered Angels Glimmer Mist in Pearl, sprayed it down, and dried it with my embossing gun. Then, I took my Martha Stewart punch punched that out.
The punched/glimmered piece is cut at: 4.25x4.00 inches.
Then, I took a plain piece of black paper (now that I think about it, I don't know why?! LOL) and cut it at: 4.00x3.75 inches.
The floral piece of paper is cut at: 3.5x3.75.
The pink/diagonal piece of paper is cut at 1.00 inches wide and I cut it at the corners of the panel.
I found a pack of these flowers by K&Company that matches the size of the flowers of the paper PERFECTLY at Archivers (my FAVORITE scrapbooking store!), so I adhered it to every flower that was whole and not covered up by the wording.
With sympathy is from Cursive 101 and was welded together at a height of .65 inches. And as always, I used Jolee's Jewels for the dot on the i in with!
Inside:
I'm not the best at decorating the insides of cards, so I just covered up the black area with paper.
The smaller panels are cut at: 2.25x4.75 inches.
The larger panel is cut at: 5.00x4.75 inches. I had EXACTLY 12 flowers left, and I like symmetry, so I stuck them on the corners.
I couldn't take how the back of the mini panel was bare, so I stuck some paper on that! lol
It is cut at: 3.5x1.75.
Have a great day!
Friday, September 24, 2010
Thursday, September 23, 2010
Happy Hanukkah!
I have been waiting for awhile to make a Hanukkah card (If I make a card too early, I never use it!). I finally broke down and made one!
I decided to make an easel card, but I couldn't figure out the size that I wanted. I like BIG cards, so my card is: 5x5.75 closed, 10x5.75 open. I use the packs of blank cards from Hobby Lobby (6.5x5) and the card fits perfectly in one of those envelopes.
In order to make an easel card using my measurements, you need to score it at 5 inches (the long, 10 inches side) and then at 2.5 inches.
The base of the card is Bazzill Shimmer paper. I took a piece of clear vellum (HL), cut it down to 5.75x2.5 and took my swiss dots embossing folder, and embossed it.
The Menorah is 5.09x4.52 (requires a Gypsy/computer program to make it this size) and is found on the Joys of the Season cartridge. I got a rectangle from Plantin Schoolbook and sized it down to 5.75x2.5 and welded it with the Menorah shadow. After I cut it, I pasted it at the bottom of the card.
I then cut the regular (unshadow) Menorah twice and ran one upside down in my Xyron machine, so I could glitter it. I added the gold glitter first, so the silver wouldn't ruin it.
I pop dotted the unglittered menorah AND the glittered one, and pasted it to the shadow. (Thank you to Donna Mundinger and her AMAZING blog! I am in LOVE with the extra dimensions using the layers of pop dots! http://donnamundinger-popsicletoes.blogspot.com/) It seems like it will pop out too much, but I promise it doesn't!
The golden dots are handmade skittles (http://www.youtube.com/watch?v=UQT1CxpOBZM). I dyed them with yellow Adirondack Inks and used the Pearl AI to make it shimmery. I stick them in a baggy, add some drops in, mix them up, then IMMEDIATELY take them out (they'll stick to each other if not), spread them out, and let them dry (it takes 1 minute tops!).
Unfortunately, they would not hold down the paper when I folded the card, so I did two things: I weighted down the paper and made another row of pop dots a little farther out. I used QuicKutz Metal Sheets (http://store.scrapbook.com/qk-adhsheets5.html) and pasted it on the back (it has an adhesive back; I stuck it behind the Menorah part of the card)
The skinny piece of metal was added, because it looked weird with two random rows of skittles, and I had that piece left over, so I stuck in on there! LOL...it measure to .25 inches wide.
Happy is from Opposites Attract and is cut at: 1.59 inches high
Hanukkah is from Gypsy Font and is cut at: 1.00 inches high. I did the same thing as the Menorah and ran it through my Xyron upside down so I could glitter it. I pop dotted the Hanukkah shadow to the card.
After I added Happy Hanukkah and the skittles, it just didn't look complete. I thought about welding dreidels together, but I thought that would look silly, and then the Star of David popped into my head!
The Star of David is from Joys of the Season and is cut at: 1.00 inch high. I welded the SoD shadow together and glittered the unshadow (?) SoD.
I LOVE how this card turned out!!! =)
Wednesday, September 22, 2010
Celebrate
I belong to the Cricut Circle, and in last month's magazine, there was a spread on banners! So I decided to have a go at it! One of the articles listed every cartridge with banners on them, so it was a cinch figuring out which one to use!
The paper line I used for this card is Cosmo Cricket's Delovely. I love the bright colors!
I got the banner from Celebrations. There is no shadow feature for it, so I made my own.
The banner shadow is: 1.03x1.01
The banner is: .84x.82
The word Celebrate is from All Mixed Up and are cut at: .50 inches high.
The C in Celebrate wasn't big enough, so I cut it at: .65 inches high.
The zebra is from Create a Critter and is cut at: 1.98 inches high.
There is nothing on the inside, because I am keeping this as a generic card. I will add something when I know what this card will be used for!
Tuesday, September 21, 2010
Wedding Card
My boyfriend (Jeremy) and I received a Save the Date to a wedding in January. It was the brightest and prettiest one I've EVER seen! So, to complicate the BEAUTIFUL StD, I made a bright and fun wedding card!
I saw this card (at the very end of this post) on Holiday with the Cricut/Everyday Cricut back in January and LOVED it! I've always had it in mind, but never found the occasion to scraplift it...Until now!! When I opened the StD, it was filled with all these awesome and beautiful ribbons (pictured below) and the card from EC came to mind!
The card itself is 5.00x5.45 inches. It requires the use of a Gypsy or Design Studio. I'm going to leave a link to the directions at the end of the blog (she does a better job explaining it than I do).
I used Jolee's Jewels on the Mr. and Mrs., to add some sparkle/
The Mr. and Mrs. is from Sweethearts and is cut at: 1.82.1.83 inches
Boyd is from Gypsy Font (my favorite cursive font) and is cut at: 1.34 inches
The O in Boyd is from Gypsy Wanderings and is cut at: 1.34
The Gum Machine is from Sweethearts and is cut at: 1.36x2.25 inches
Here is the inside:
The wedding gown and tux is from Sweethearts and are both: 3.99 inches high
There are a gazillion hearts to choose from, but I didn't feel like searching, so I used the heart from the key and heart-lock on Sweethearts and used the hide contour feature to get rid of the lock. The heart is 1.73 inches high.
Instead of putting it in an envelope, What I'm going to do is create a pocket with the ribbons stick out of the envelope on the left side!
Here is where I got the idea from:
http://www.cricutholiday.com/2010/01/wild-card-wednesday-lets-shake-things.html
Monday, September 20, 2010
Happy Birthday! Slovak Style
My Grandmother is pretty fluent in Slovak (Her family is from Czechoslovakia), so I thought it would be cool to make her a card in Slovak! It sounded like a great idea, until I googled "Happy Birthday in Slovak" and learned how LOOOONG it is!
The card is 5.75x4.5 inches.
Vsetko k najlepsie narodeninam height is .65 in Mickey Font
In order to get the circle, I combined a circle and a square the size of the card, and cut it out that way
I got a Crop-A-Dile last year for Christmas, and it came with all different kinds of eyelets, so I felt it was time to put those to use!
I am REALLY bad at keeping the little dots for the I's (and !, j's, .'s, ?'s), so I use my Jolee's Jewels and stick a jewel in its place!
HAPPY BIRTHDAY is .80 inches high
That's in Slovak! is .65 inches high
In order to get the apostrophe in "that's" I took the quotation mark and applied the hide contour feature on my Gypsy, and welded it to the letters.
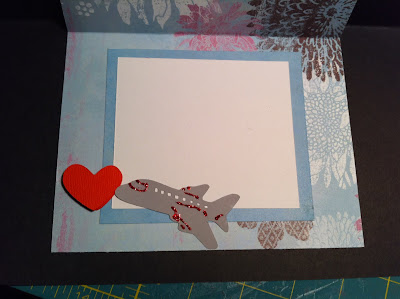
Come Fly With Me
Saturday, September 18, 2010
You're Fangtastic
A Boring Lesson in Geography
Tree Card
I can't find the original card I scraplifted from, but I'm almost positive I found it at scrapbook.com
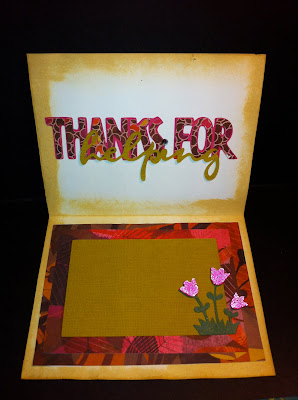
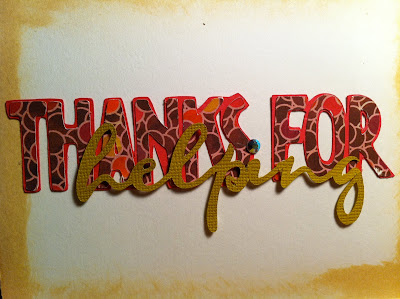
Thanks For Helping
My plans with this blog
I have a lot of cards that I've made and I don't know the dimensions on them. I'm going to post them, and THEN, any new cards I make, I will do more explaining! If you see any cards that you are interested in and I don't have any information next to it, please ask!
Saturday, September 11, 2010
Subscribe to:
Posts (Atom)